


Post by saabfan on Jan 1, 2016 13:04:58 GMT
How to Bring your LDD Creations Alive
LDD is a perfect tool for building digital models but when it comes to presentation it is rather awful. At least that is what most users think.
In this tutorial I want to show you that you can also make pretty cool images without any rendering programs.
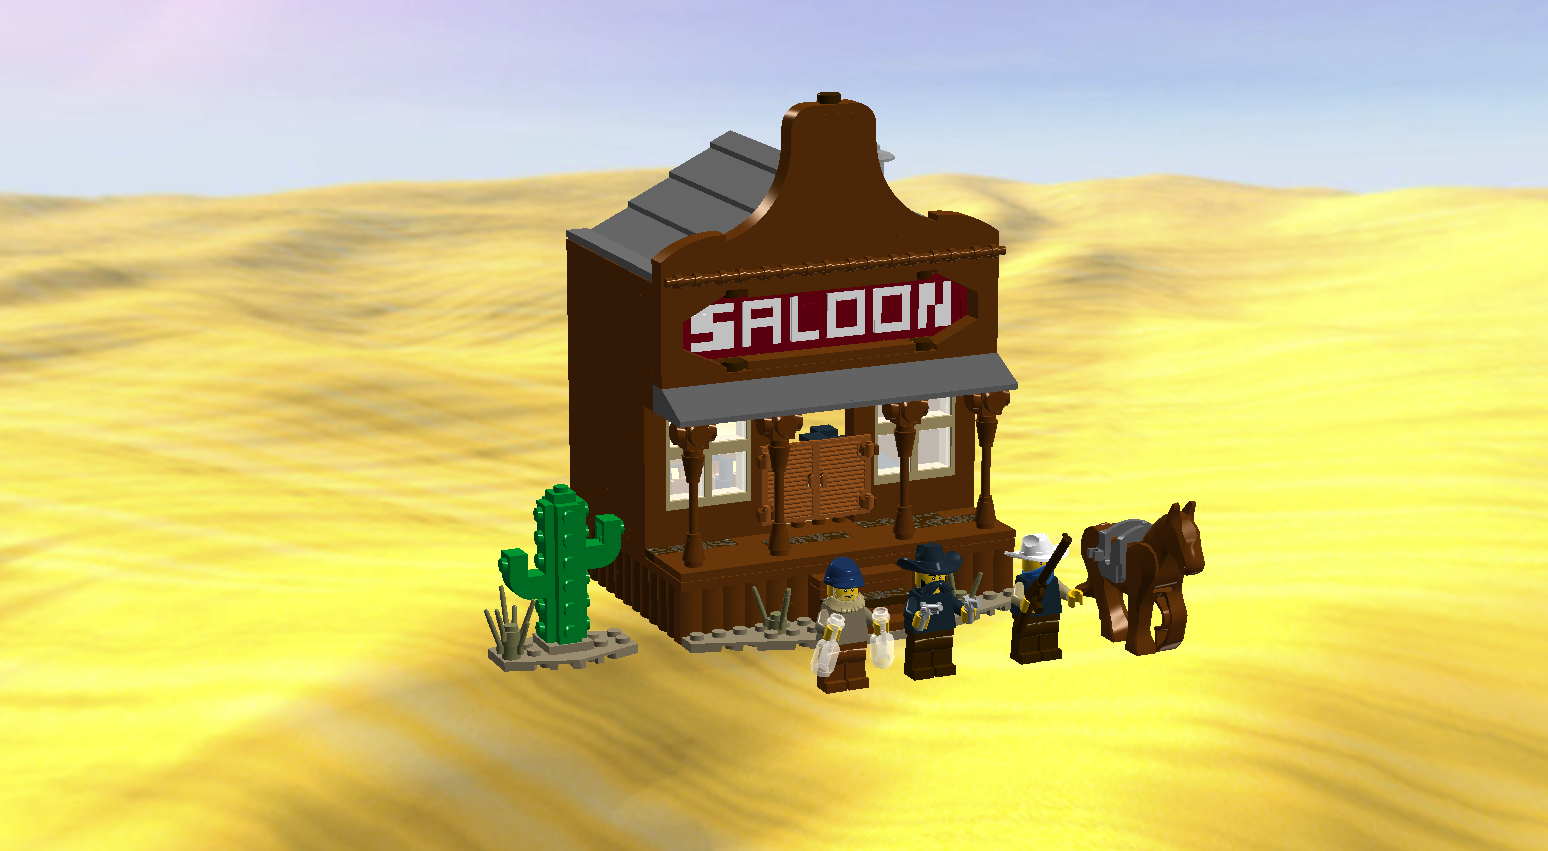
The following tutorial will use my western saloon model.
Most of the users who do not render their projects use the simple LDD screenshot function with the default backgrounds. But not only that. Often the minifigures (if included) are just lined up in front of the model and all parts of the creation are parallel.
But what the majority of the users does not know is that there are actually some settings in LDD which improve the look of your model drastically.
Number 1:
Brick outlines! You can make the brick outlines visible. This may not appeal to everybody but I think it improves the look heavily.
It works like this:
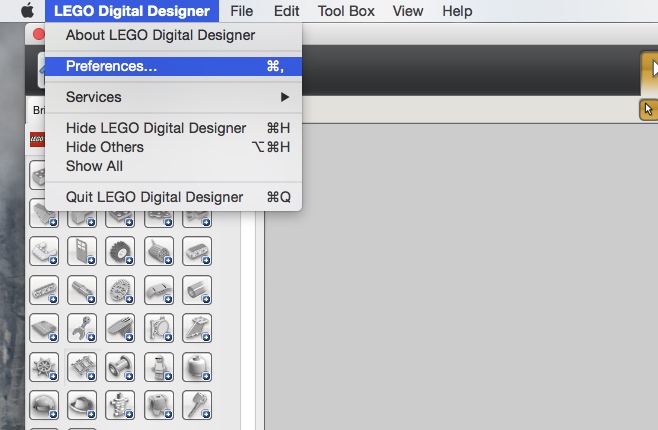
Click on "Lego Digital Designer" (which should be on the top left corner) and then on "Preferences". After that a new window called "Preferences" should pop up.
There you also find number 2:
Advanced shadings.
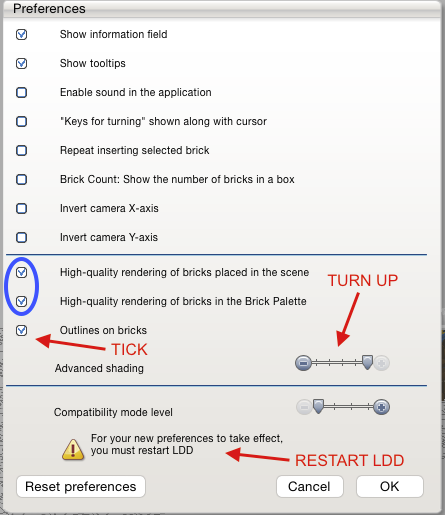
The details are explained in the picture below.
Tick the "Outlines on bricks" and turn up the "Advanced shadings". Then click on "OK" and restart LDD.
Notice: In order to be able to change those you first have to tick the two blue circled buttons!
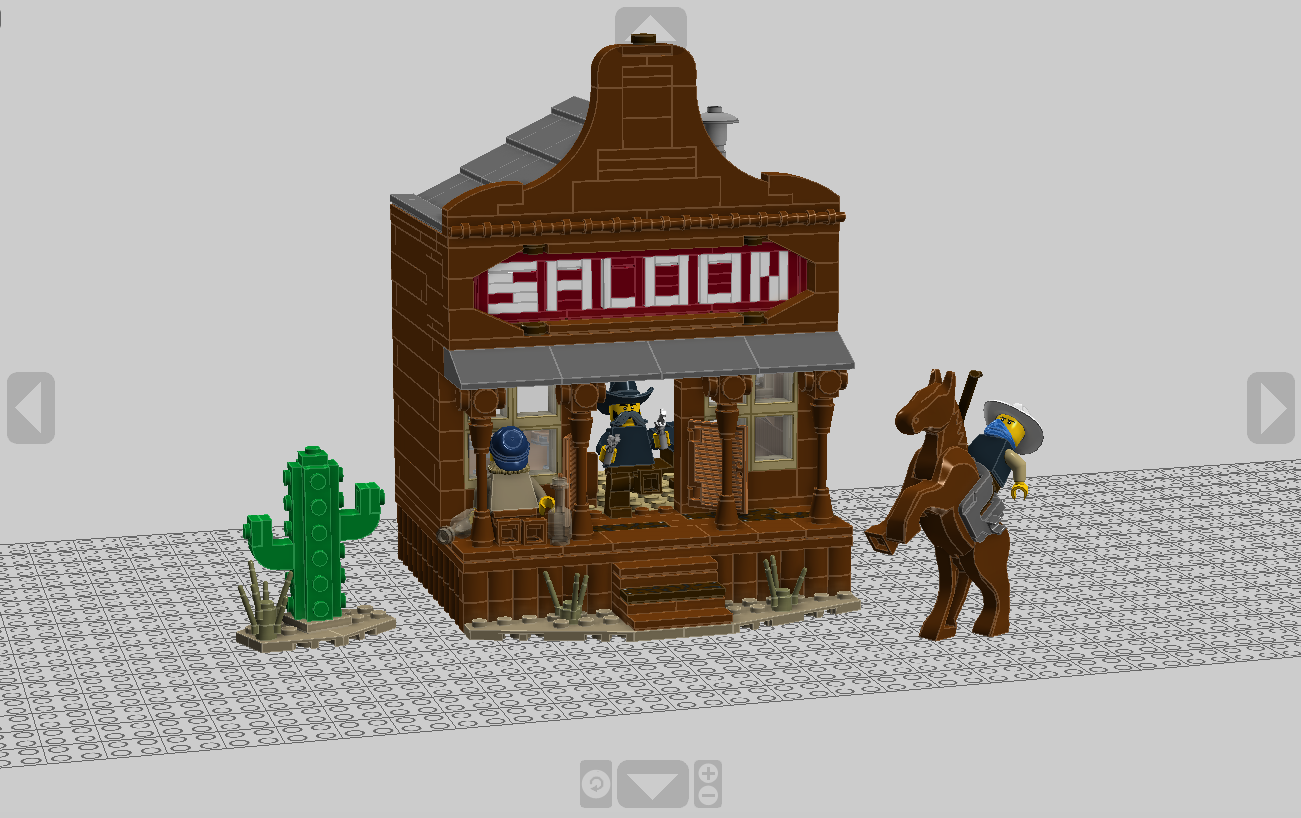
After that it already looks a lot better.
Now it is time to move on and pose your minifigs/model.
As you can see I rearranged the cactus and the minifigs. Now the whole scene looks a lot more "alive".
Now comes number 3:
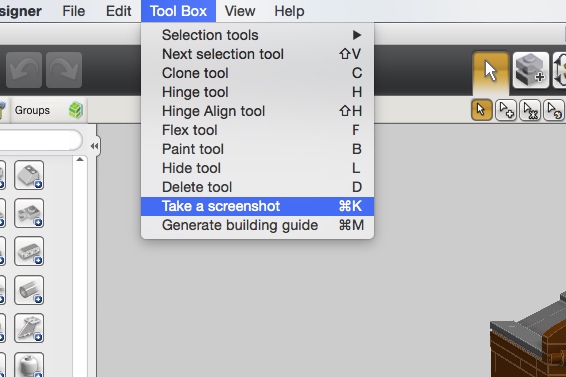
Advanced screenshots.
What most people do not know either is that there is actually another screenshot function in LDD. The advantage of this one is that it creates a picture without a background so you can add your own.
It works like this:
Click on "Toolbox" and then on "Take a screenshot". (Or simply use the shortcut displayed next to "Take a screenshot" which is ctrl+K on Windows)
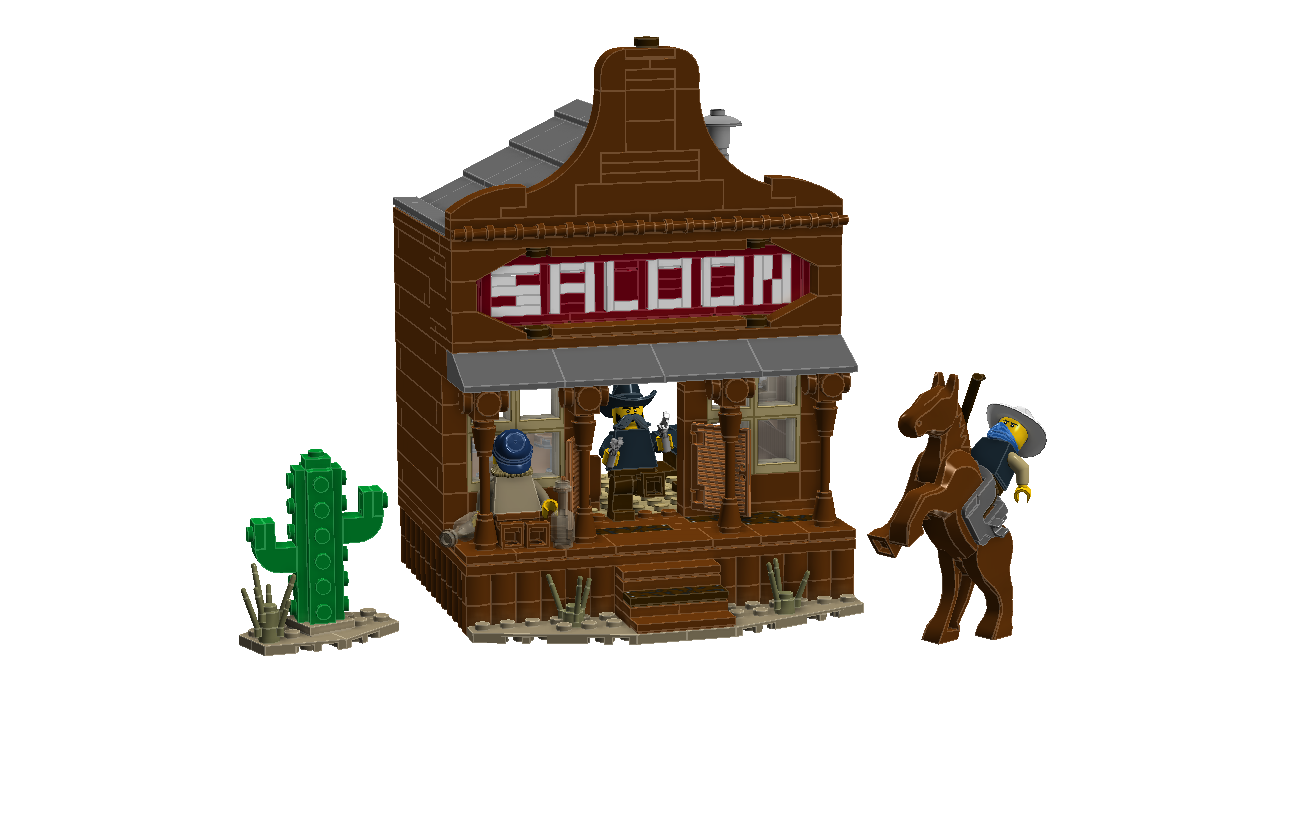
Then you select where you want to save the screenshot and it will be saved without any background.
Finally number 4:
Backgrounds!
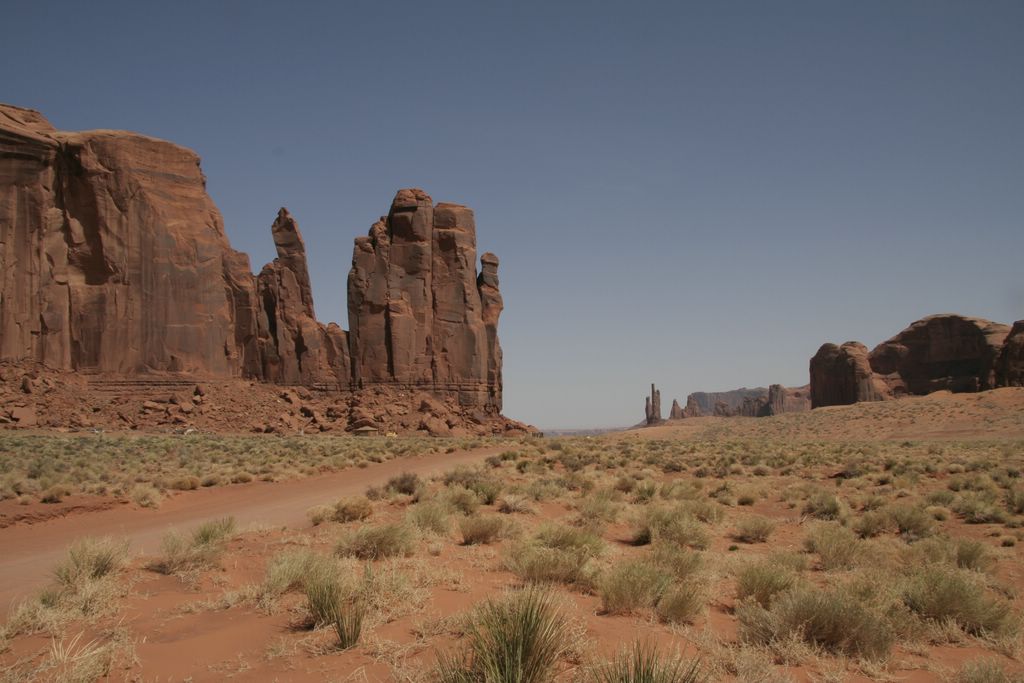
Now it's time to find a proper background for your creation. (simply search in Google)
For my Saloon I chose a western desert.
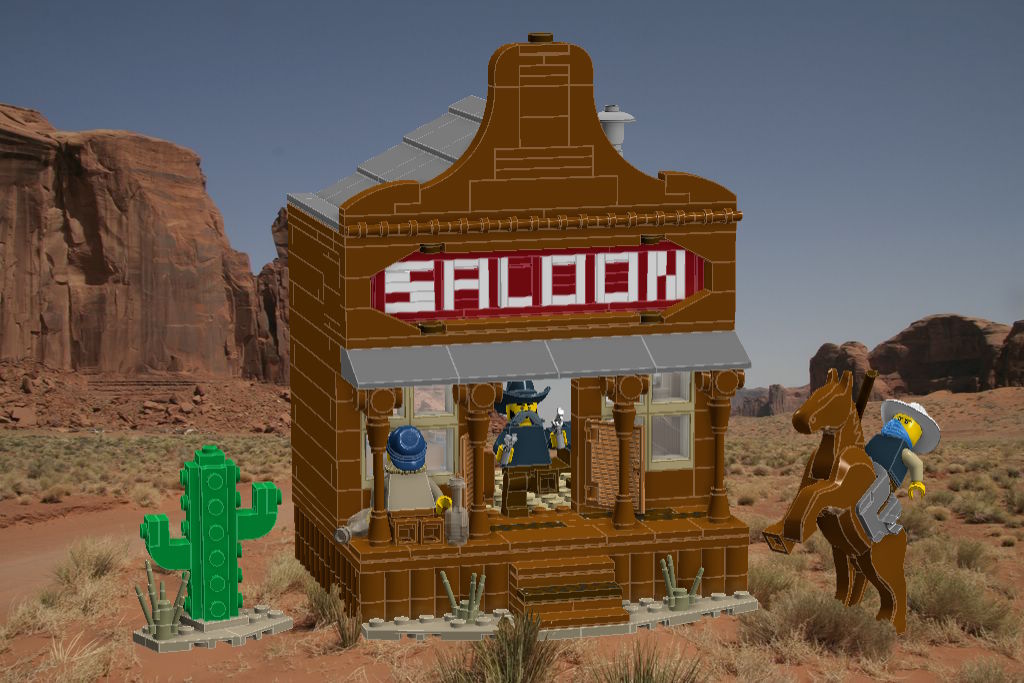
Now open both pictures (the screenshot and the background) in an image editing program. (I used Mac Preview)
Copy the screenshot and paste it into the background. With a few tricks you can even make it look more realistic. (e.g. cut out some grass and put it into the foreground. See at the back feet of the horse)
If you're interested to see how I did it check out these pictures:
farm9.staticflickr.com/8748/16804394740_ee0cab2157_o.png farm9.staticflickr.com/8712/16369473704_bf44aabf82_o.png farm8.staticflickr.com/7587/16804140498_52ff3002d8_o.png farm8.staticflickr.com/7629/16784465977_22a573a330_o.png farm9.staticflickr.com/8692/16784465877_6b2e9961e0_o.png farm9.staticflickr.com/8691/16990474722_5343fa0644_o.png
Now you have a (at least that's my opinion) great looking head image without rendering anything!
Notice: Of course number 4 works also for rendered images. The only condition is that the rendered picture has no background.
Here are two other examples. (including a rendered one)
farm8.staticflickr.com/7639/16810226280_48337bd80f_o.jpg farm9.staticflickr.com/8689/16997778345_d630393e8d_o.png
Thanks for reading!
Do not forget to do the poll on top to let us know whether you find this useful or not. Also feel free to share your thoughts in comment section.